While photos were allowed, they weren’t encouraged because photos that look good on a computer screen can look bad when printed unless the creator knows what they are doing. I’ve worked as a professional printer in the past and am aware of these issues and know how to avoid them, but for purposes of this assignment I wanted to stick with drawings.
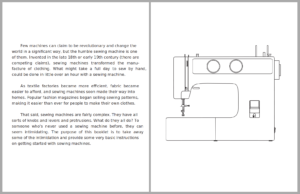
The professor provided a couple of examples from previous semesters so we would understand what the assignment entailed by reviewing them. One of the examples was a simple sewing project to create a fabric pencil case, which inspired my own project on how to thread a sewing machine. Despite being around for over a century, most home sewing machines of today aren’t very different from those sold over a hundred years ago. Thinking about the sewing machines I’ve often seen for sale at yard sales or in thrift stores, they’re often missing the manuals that originally came with them. This leaves an information gap that I hope can be filled by this booklet.
Most of the booklet contains instructions for threading the upper and lower portions of a sewing machine. Because the basics of sewing machines are mostly unchanged in over a century, these instructions should work for virtually any home sewing machine. However, features such as thread tensioning, stitch length adjustment, stitch reversing, stitch types, and so on, vary widely between sewing machine models and couldn’t realistically be covered by a simple booklet.
All of the images were created using Inkscape, an open-source vector-graphics editor. Most of the images were technical drawings, though the front and back covers were more abstract. The technical drawings had the advantage of being simple to create because they didn’t need to include colors or shading. To maintain the simplicity of the drawings, only the top, side, and front views were created, as opposed to isometric or perspective drawings. When creating the drawings, I felt that isometric or perspective drawings wouldn’t present anything not covered by the other images, but would take more time to create.As the images were finished, I put them into a document created in Scribus, which is an open-source desktop publishing program. Although I experimented with Scribus several years ago, because this project required the booklet be printed, I had to learn some features I never previously used. The experiments of years ago had been simple PDFs that weren’t necessarily meant to be printed, while this booklet required some new skills. Among these was the need to use the pre-flight check system to make sure the document was suitable for printing. To make it suitable for printing, the pages needed to be arranged in an order that allows four pages to be printed on a single sheet of pager.
The assignment was a nice way for me to get reacquainted with Inkscape and Scribus, and for people who are new to sewing I think the booklet is one that can fulfill a genuine need.

